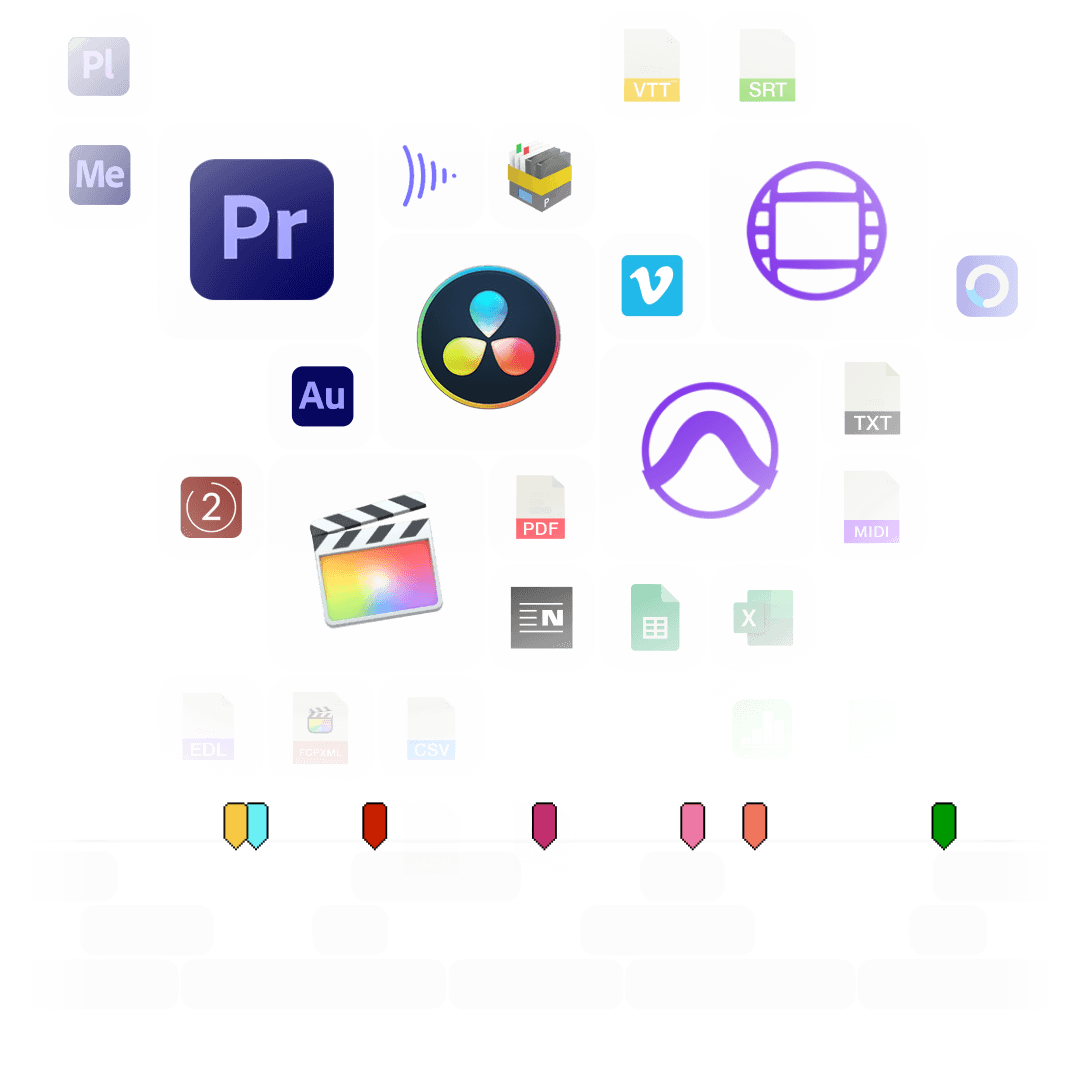
تبسيط تبادل العلامات بين البرامج المختلفة. قم بتحويل علامات الخط الزمني إلى تنسيقات مختلفة لبرامج Premiere Pro وDavinci Resolve وMedia Composer وPro Tools وFram.io وPix وCSV وجداول بيانات Google وPDF وغيرها. تتيح لك الأداة أيضًا تصفية العلامات حسب اللون أو تبديل الألوان أو نقل الرموز الزمنية وتصحيحها.
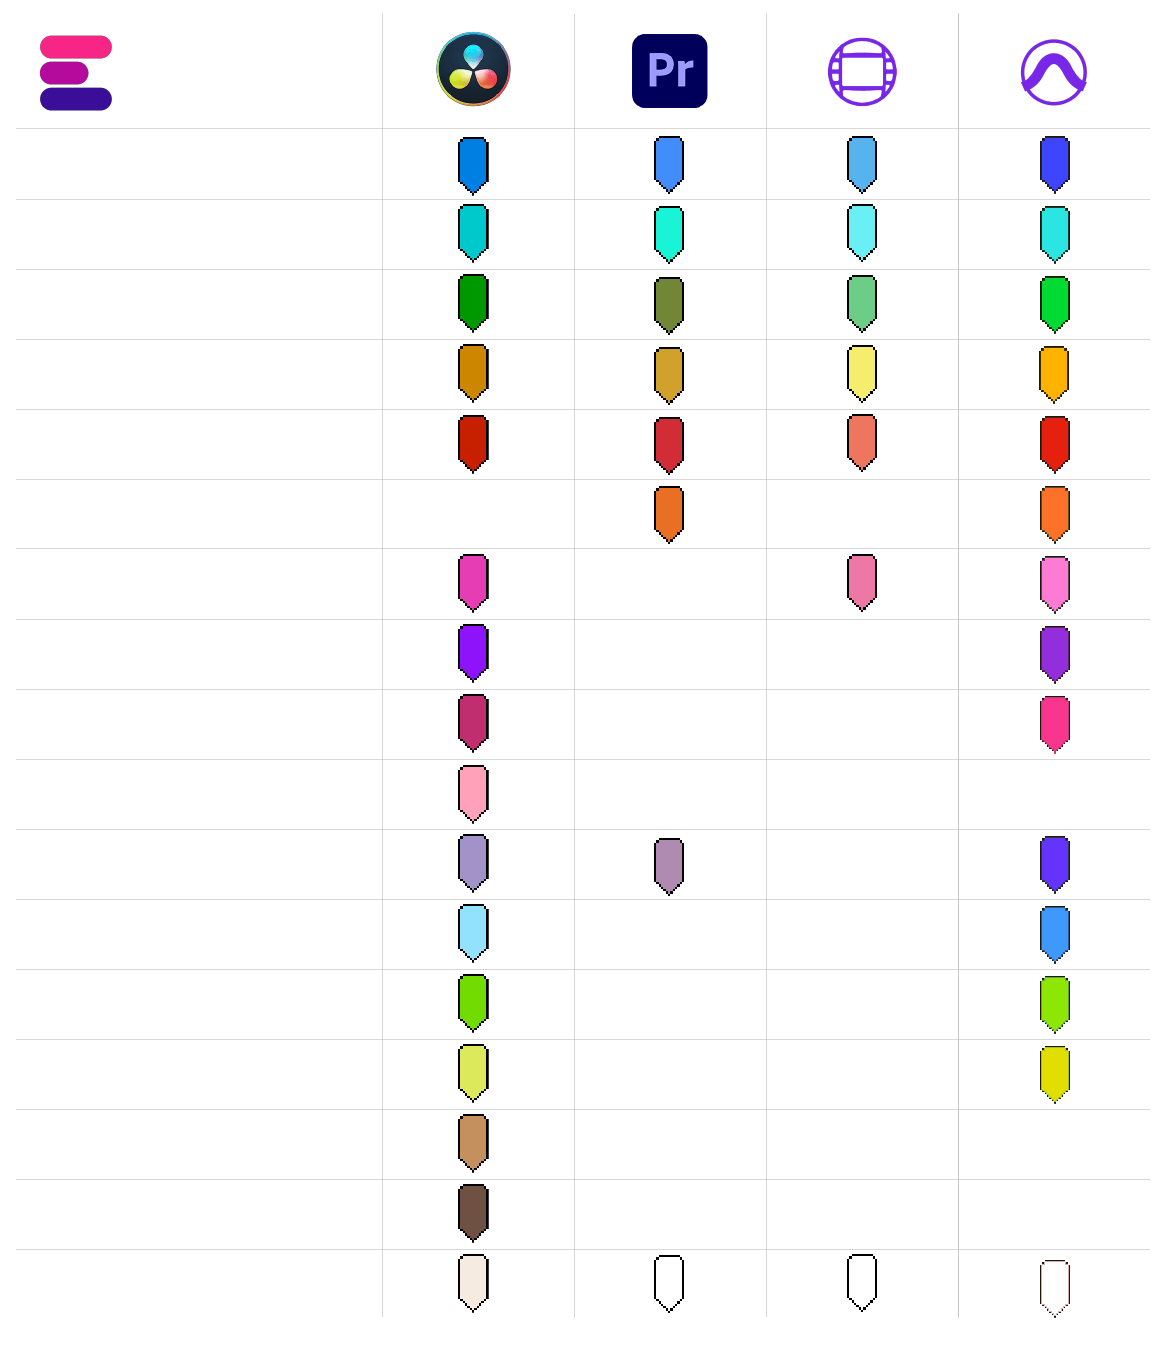
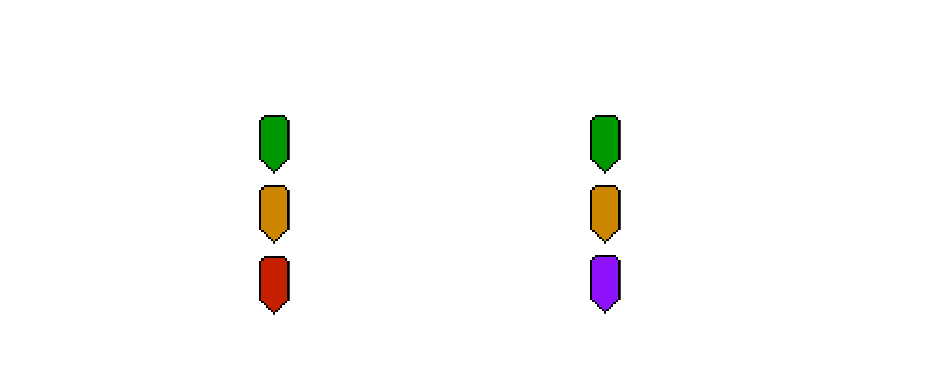
لا توجد قواعد موحدة لألوان العلامات في البرامج المختلفة. يستخدم كل برنامج درجات لونية مختلفة وجزئيًا أيضًا أسماء ألوان مختلفة. يحاول محول العلامات في EditingTools.io تعيين لون العلامة إلى أقرب مجموعة لونية.
من خلال هذا الرسم، يمكنك الحصول على نظرة عامة على الألوان التي يتم التعرف عليها وكيفية تفسيرها.
يمكنك تحديد لون علامة افتراضي لاستخدامه، إذا لم يكن هناك لون محدد أو غير معروف في ملف الاستيراد.
باستخدام هذه الوظيفة، يمكنك تصفية العلامات وتحديد أن يتم تحويل علامات معينة فقط. إذا كنت تريد تصفية أكثر من لون واحد، يُرجى استخدام وظيفة "تغيير ألوان العلامات".
استخدم هذه الوظيفة لتحريك جميع العلامات بنطاق معين. يمكنك إدخال قيمة موجبة أو سالبة.
قم بتنشيط هذا الخيار لتضمين علامات المقاطع من Premiere Pro XML و FCP7 XML. سيضيف هذا الخيار أيضًا معرف المسار، واسم المقطع، والمصدر، والرمز الزمني للمصدر، والرمز الزمني للمصدر إلى صادرات CSV.
قم بالكتابة فوق أسماء العلامات وتعيين عنوان علامة منفصل لكل لون. على سبيل المثال، يمكنك تلقائيًا تسمية جميع العلامات الصفراء "VFX" وجميع العلامات الزرقاء "ADR" دون فقدان الوصف.
استخدم هذه الوظيفة لإعادة تعيين ألوان العلامات. ما عليك سوى تحديد ألوان العلامات الجديدة عبر حقول التحديد. يمكنك أيضًا استخدام هذا الخيار كمرشح ألوان متقدم.
يمكنك تحميل ما يصل إلى 20 ملف علامة مختلف في نفس الوقت ودمجها في ملف علامة واحد. يرجى ملاحظة أن هذه الملفات يجب أن تكون جميعها بنفس التنسيق.
أدخل الرمز الزمني لبدء الجلسة أو تسلسل التحرير الخاص بك، إذا كنت تستخدم شيئًا آخر غير 00:00:00:00:00. هذا مطلوب على سبيل المثال إذا قمت بتحويل إلى Avid Pro Tools و Adobe Premiere Pro أو من Frame.io أو Pix إلى أي تنسيق آخر.
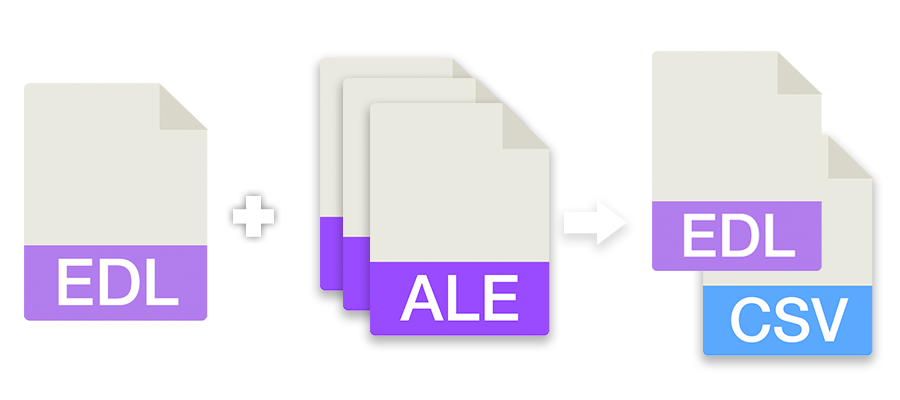
يمكنك تحديد ملف EDL وتحويل كل مقطع إلى علامة. هذا مفيد لوضع علامات على جميع لقطات المؤثرات البصرية دفعة واحدة، على سبيل المثال. ضعها على مسار منفصل في برنامج تحرير وتصدير EDL مع مسار الفيديو هذا فقط. اضبط حقل "تحويل من" على "تحويل المقاطع من EDL إلى علامات".
The following applications and file formats are supported among others. See our instructions for each format below.
| Editing Software | Adobe Premiere Pro, Adobe Audition, Apple Final Cut Pro, Avid Media Composer, Avid Pro Tools, DaVinci Resolve |
| Review Tools | Frame.io, Vimeo Review, Dropbox Replay, Pix Systems, NoteTracks Pro, Krock.io |
| Subtitles | SRT, VTT, SBV, (more in our Subtitle Tool) |
| Docs & Sheets | PDF, CSV, Text, Excel, Google Sheets, Apple Numbers, OpenDocument Spreadsheet, TSV |
| Other Tools | oTranscribe, Adobe Prelude Live Logger, NanoLokit Logs |
Go to "File -> Import" and select the xml file.
Select the sequence in your project tab.
In menu, go to: "File -> Export -> Final Cut Pro XML"
Select "Final Cut Pro XML" and hit ok.
You can use Adobe Prelude Live Logger app to create live timecode notes and tags which you can export and convert in this tool into other marker formats.
Go to: "Tools -> Marker"
Right Click: Import Markers
Select the generated "xml" or "txt" file from EditingTools.io.
Go to: "Tools -> Marker"
Right Click: "Export Markers as XML" OR "Export Markers as Text"
Select "Change marker duration" from the "more options" menu.
Yes, you can overwrite the marker name within the marker description field in Media Composer. Simply use "|" to separate the name and the description. When you import the markers to EditingTools.io, it will be split into name and description.
Avid Media Composer might fail importing markers if they overlap.
There are 3 different ways to bring markers into Avid Pro Tools. The most suitable of these 3 is the Pro Tools PTX format.
| PTX Session Data | MIDI File | EDL File | |
|---|---|---|---|
| Marker colors | Yes | No | No real markers but clips with the marker name as clip name. |
| Individual Session Timecode Start | Yes | Yes | Not relevant |
| Adjustable audio pull rate | Yes | No | Not relevant |
| Adjustable sample rate | Yes | No | Not relevant |
| Import new markers at a later time | Yes | No. Pro Tools allows only one Midi track with markers per session. | Yes |
In ProTools, go to "File > Import > Session Data". Select and open the generated ".ptx" file. In the "Import Session Data" window, make sure the "Ruler Markers / Memory Locators" box in the lower "Session Data" panel is checked. Press "OK" and your markers will be imported.
The PTX converter was developed in partnership with Sounds in Sync. Therefore, we are currently unable to offer the converter for free.
We are currently unable to offer a flat rate for PTX conversions. If you need unlimited conversion, you can have a look at EdiMarker from Sounds in Sync.
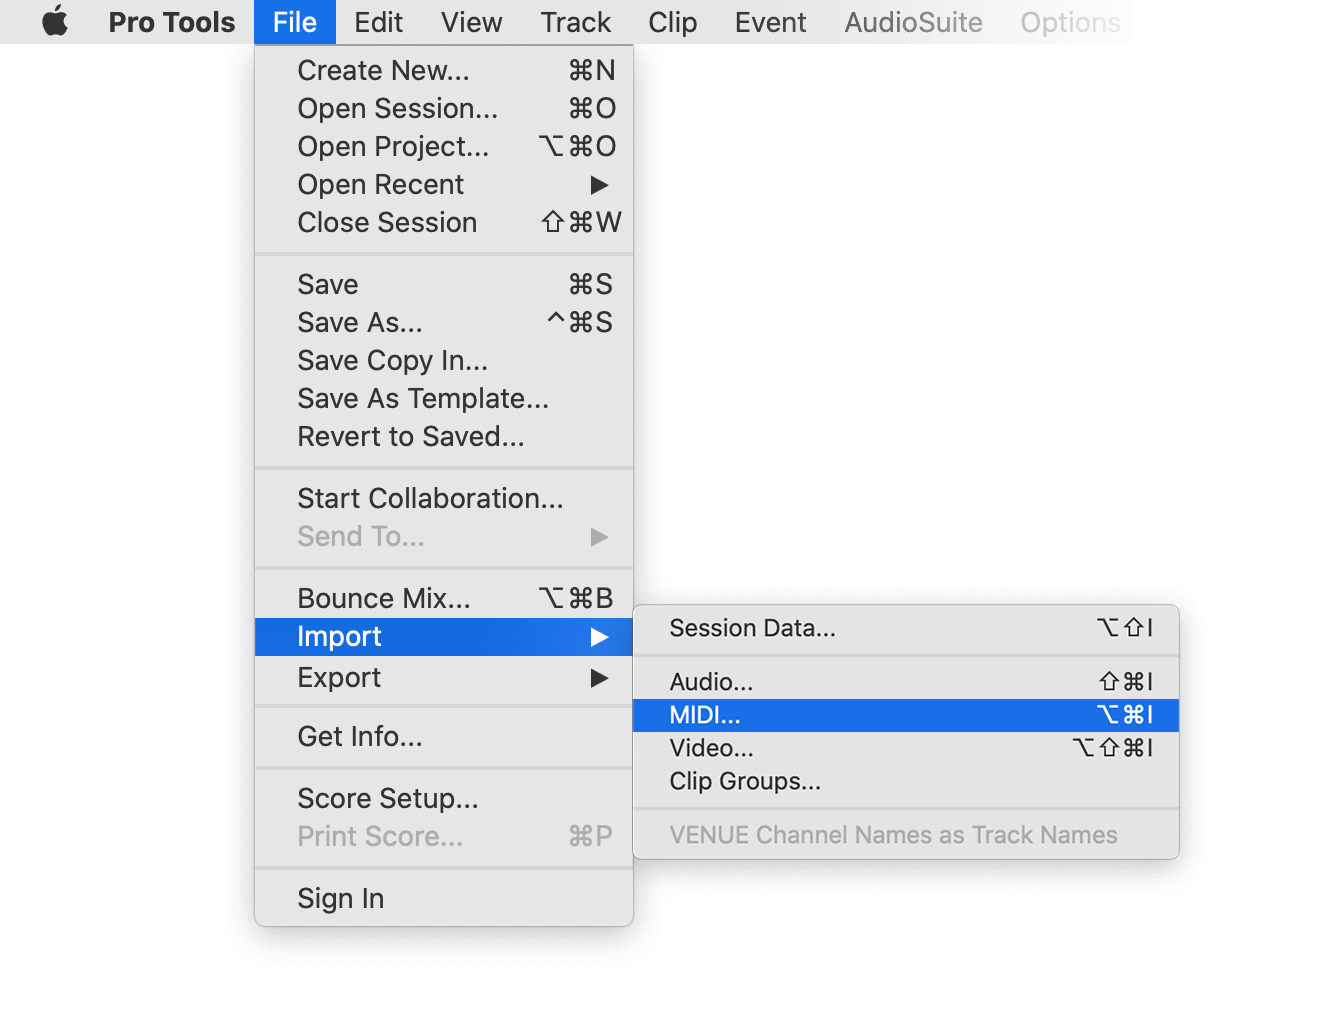
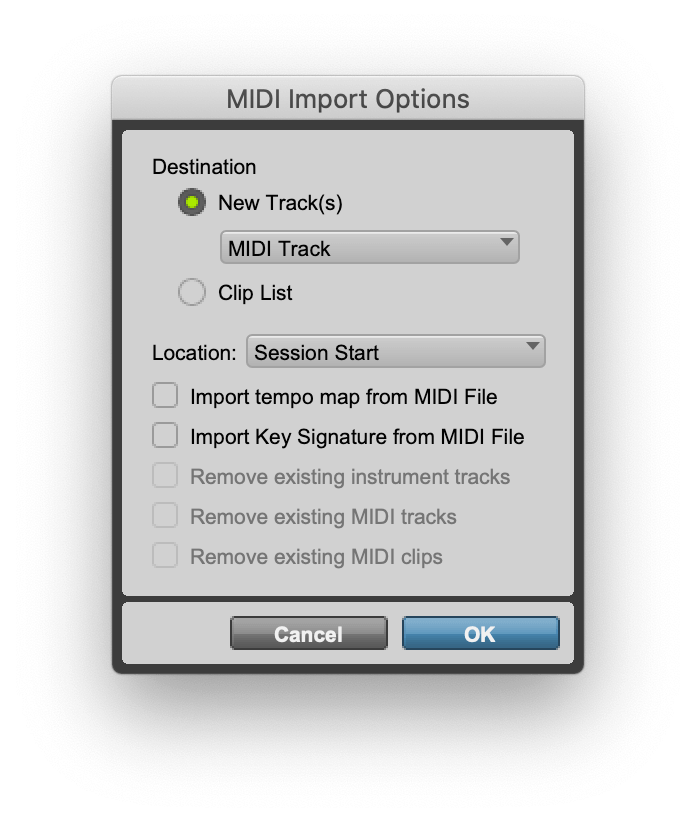
Under "File -> Import -> Midi" you can import the generated marker file into Pro Tools. Select the file and then "Add Midi Track". Attention, if there is already a midi track with markers you have to remove them first. If your session is not at 00:00:00:00 the imported markers have an offset.
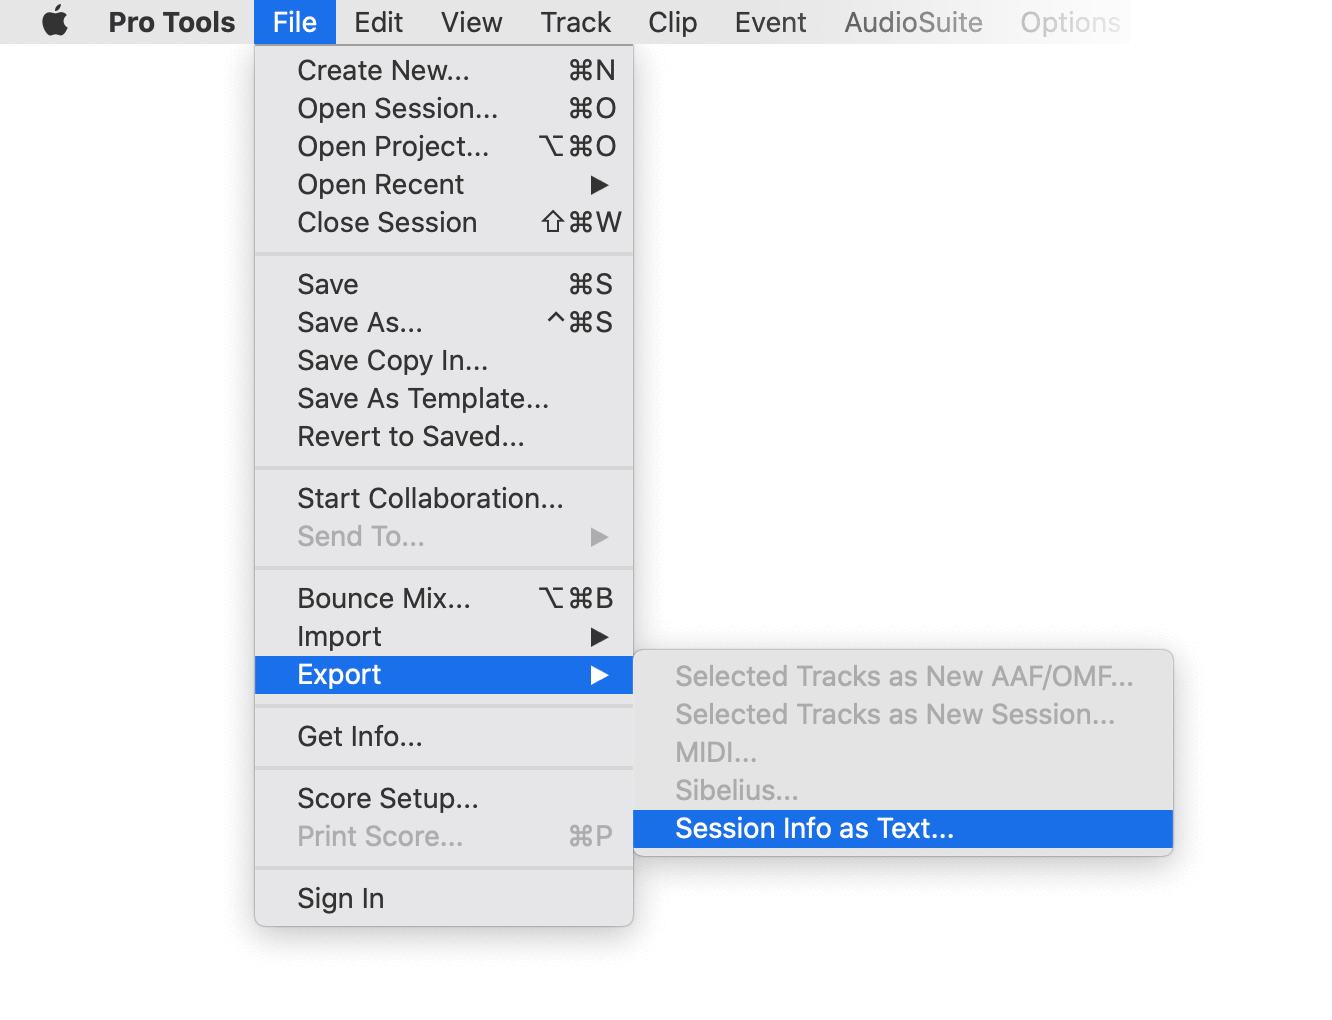
Under "File -> Export -> Session Info as text" you can export the markers from Pro Tools.
1. Create a new timeline or open a timeline in your project
2. Right-click the sequence timeline in your media tab.
3. Navigate to: Timelines > Import > Timeline Markers from EDL
4. Select the edl marker file for Resolve.
1. Select the sequence in your media tab.
2. Right-click the sequence timeline.
3. Navigate to: "Timeline > Export > Timeline Markers to EDL (.edl)"
Navigate to: "Timeline > Export > Edit Index (.csv)"
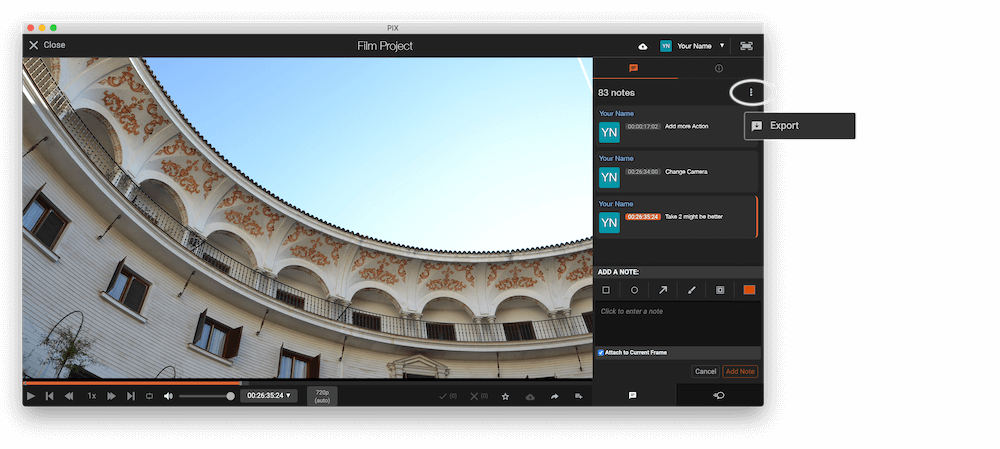
Open the comments panel on the right side in Pix. Press the three dots and select "Export". You can then download a CSV file from Pix that you can import into EditingTools.io.
Export markers from frame.io in marker menu "Download as File" > "CSV".
Export review notes from your project on vimeo.com as "CSV". Select "Vimeo Review" in the tool as "from" value.
You can use this tool to convert markers to YouTube Chapter Markers for the video description. Select "Convert to" to "YouTube Chapter Markers (.txt)". Open the generated .txt file and paste its contents into your video description.
To export markers and comments from NOTETRACKS Pro, click the Download button in your active session and select "NoteTracks.com > Audition Markers (.csv)". In our Marker Tool, select Convert from "NoteTracks.com > Audition Markers (.csv)".
NOTETRACKS Pro is an online review platform for audio creators. Learn more at notetracks.com.
To export comments from Krock.io, select a video and open the menu via the three dot icon. Select "Export comments to csv" to export the comments. In the marker converter select "Krock.io" as "convert from" value.
Krock.io is an online media content review tool. Learn more at Krock.io.
Convert comments from E-Mail, Word, Pages, Slack, Chats or any other clean Text Source into markers using the Textfield option. Simply copy and paste the comments into the textfield.
0:32 Please add Music
1min Intro
1:55min Add Cut
17.6min VFX Shot?
21:12 Add Detail Shot
23.1 VFX
75:20 Credits?
1:32, 01:32, 00:01:32, 1.32, 01.32, 1:32min → TC 00:01:32:0075:20, 75:20min, 75.2 → TC 01:15:20:00
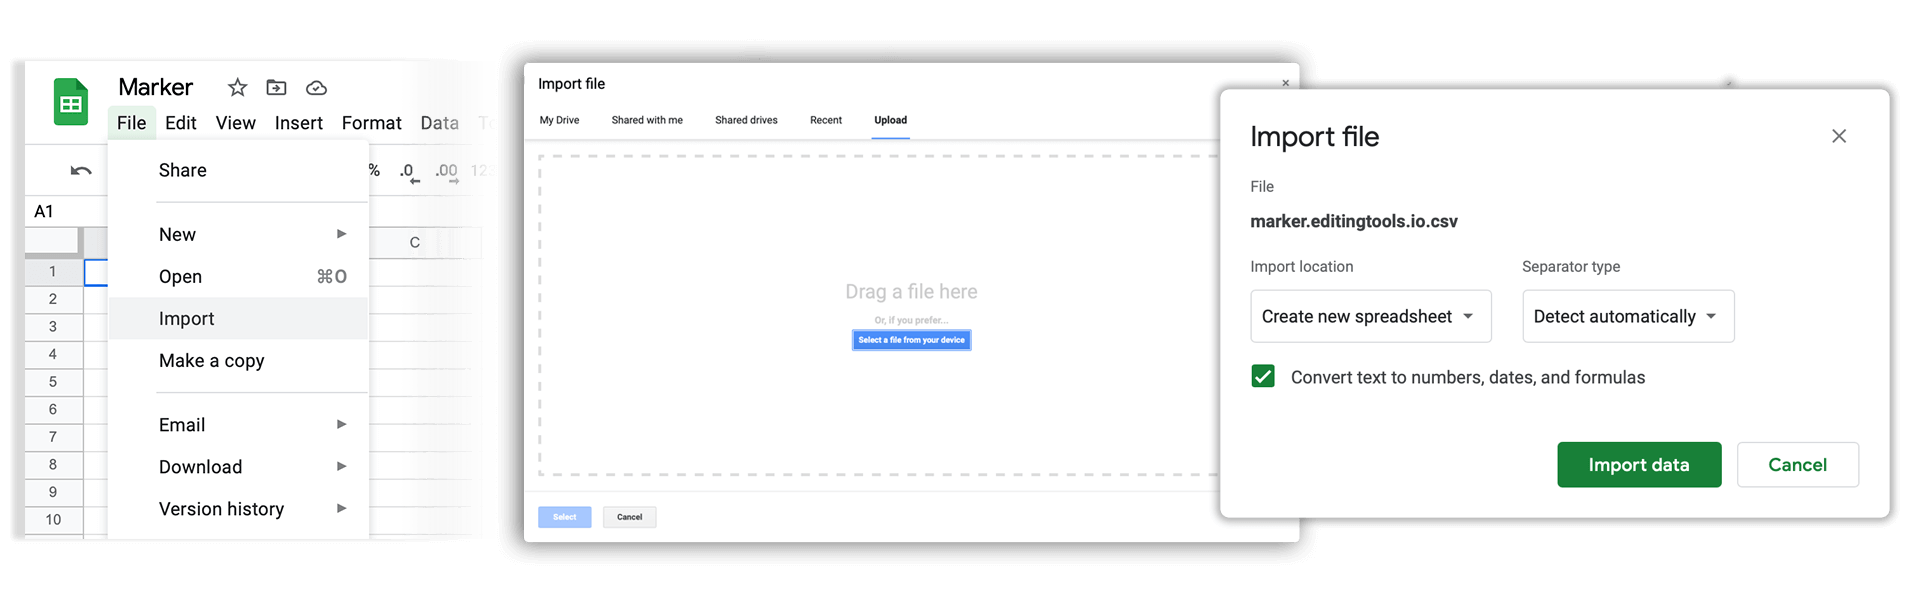
Open Google Sheets and go to "File -> Import". Upload the generated CSV file and press "Import Data".
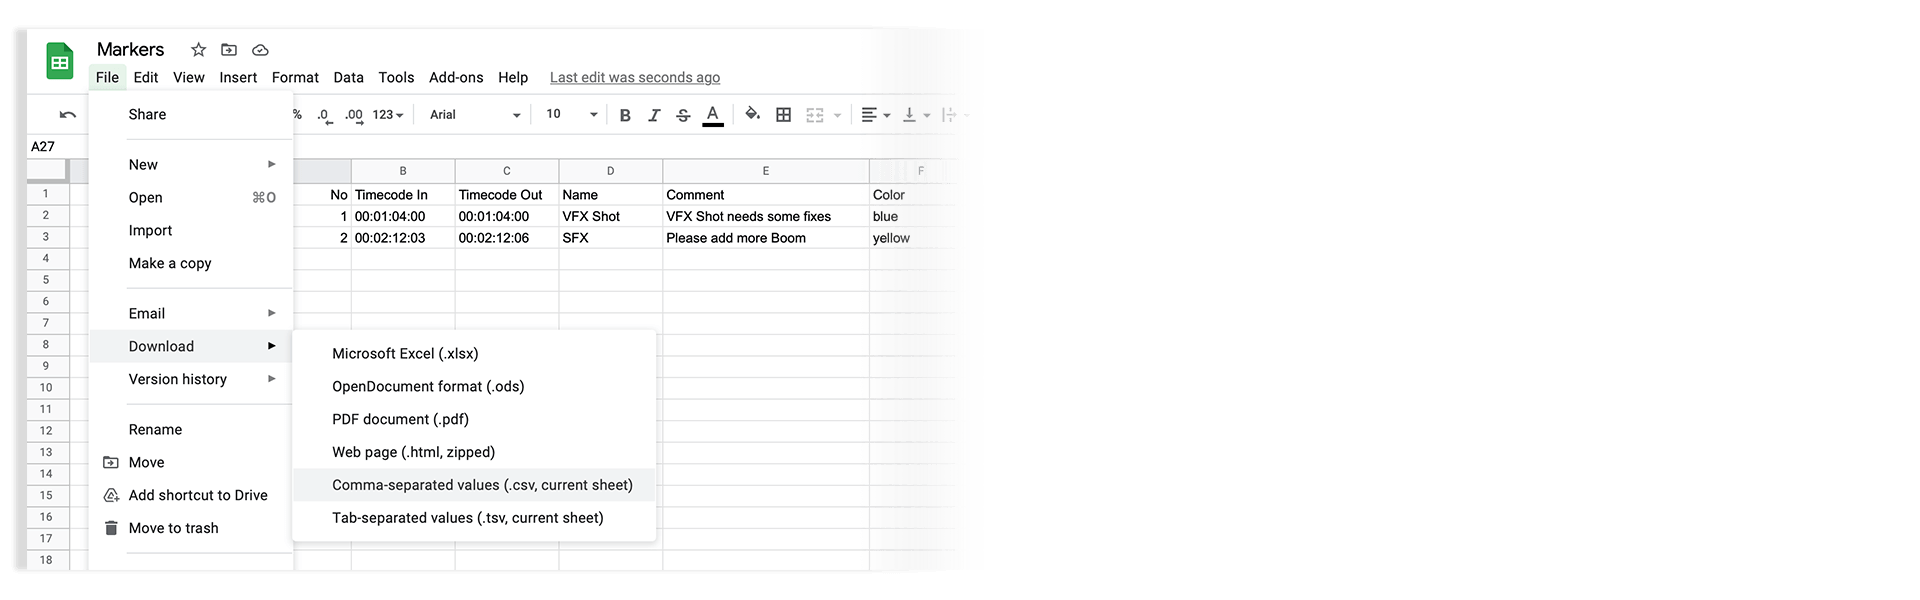
Go to "File -> Download -> Comma-separated values". Download the CSV demo file here: demo_marker_file.csv.
Markers can be exported as XLSX or XLS files for Microsoft Excel.
Markers can be exported as ODS (OpenDocument Spreadsheet) file for Open Office Calc.
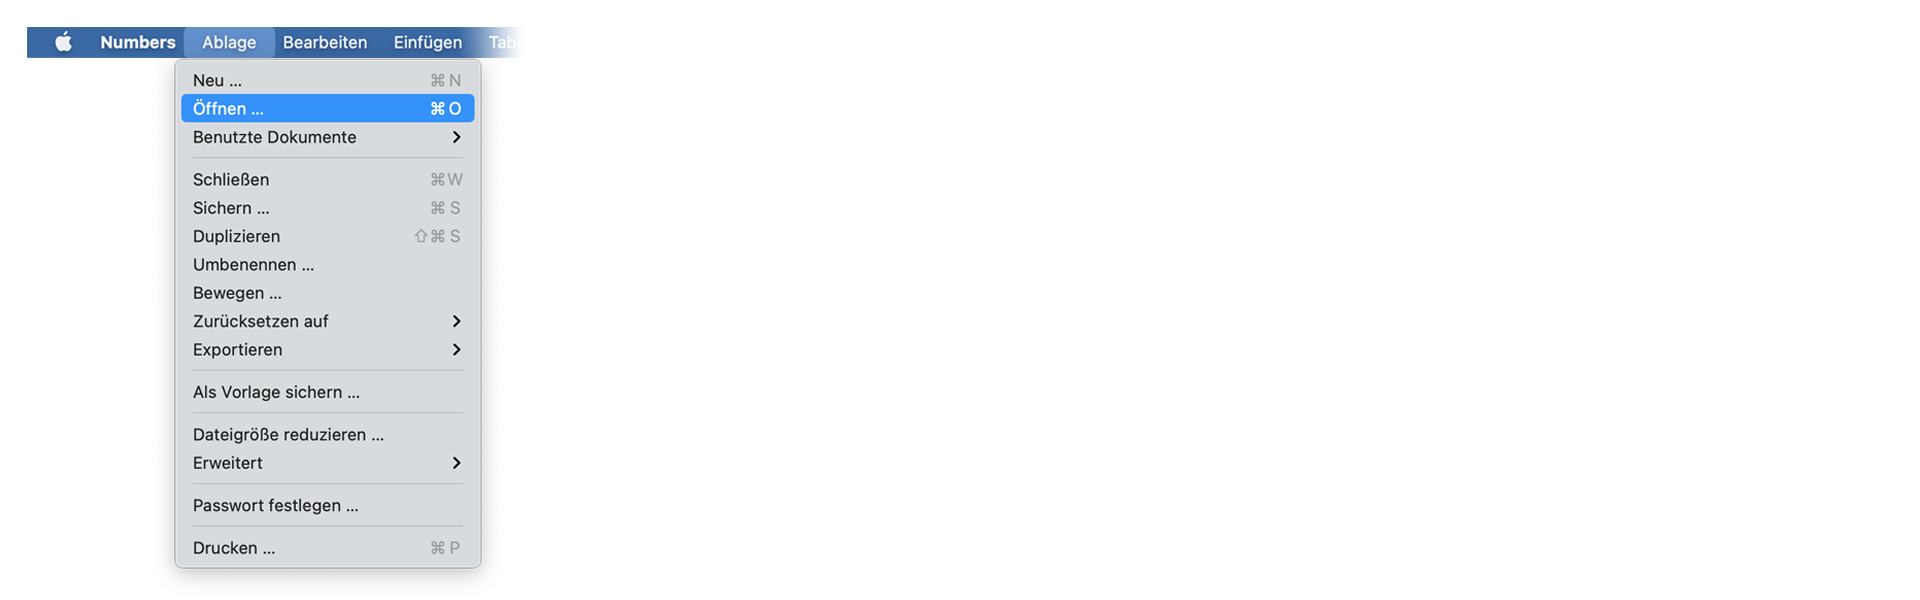
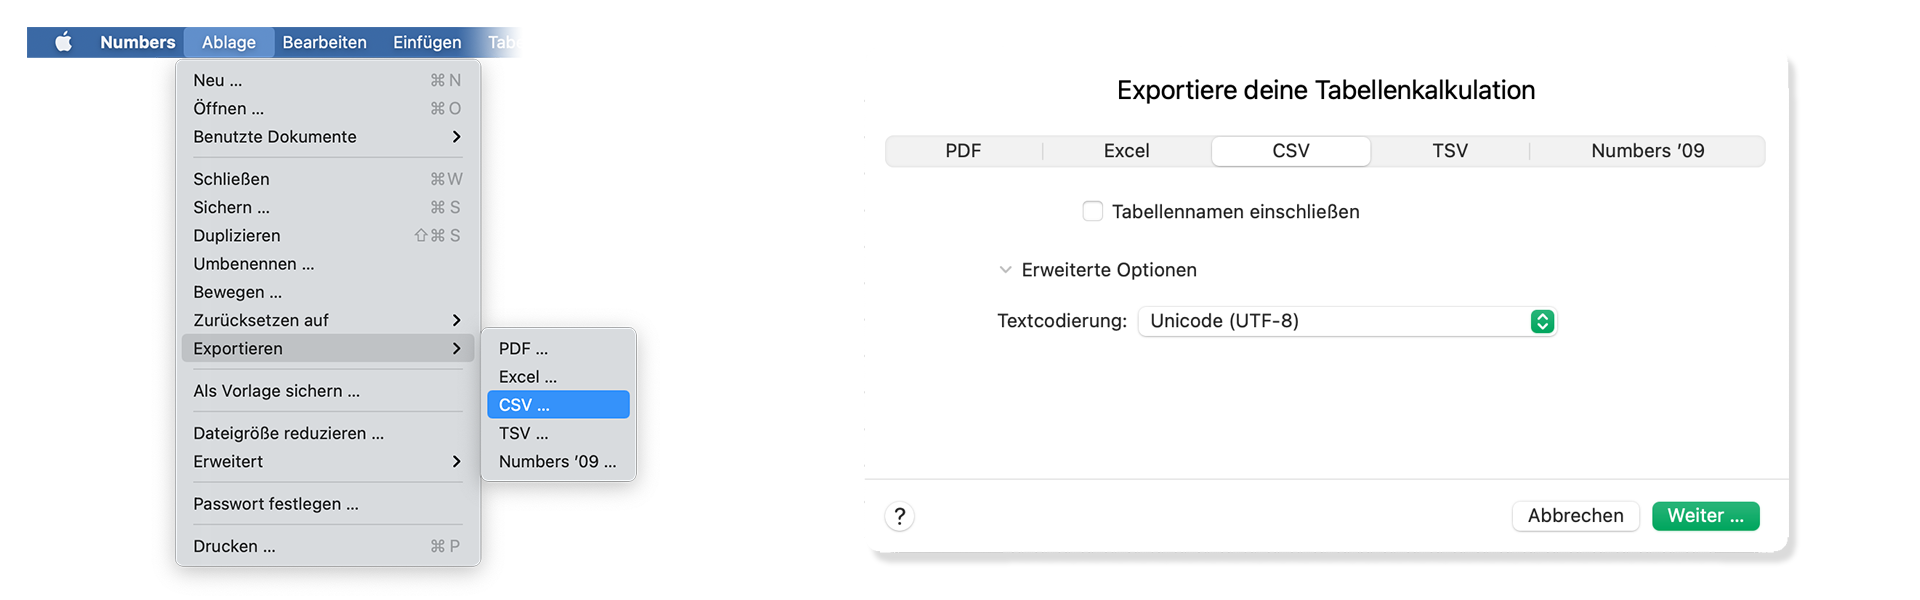
Open Numbers and go to "File -> Open". Simply open the CSV file.
Go to "File -> Export -> CSV". Download the CSV demo file here: demo_marker_file.csv.
Yes. Just take a look at our demo files to match the rules for correct interpretation. The marker converter accepts comma-, semicolon- and tab-separated files.
Download the CSV demo file here: demo_marker_file.csv.
Marker CSV Preset in Google Sheets: Open in Google Drive.
Only "Timecode In" is necessary. All other headers are optional. Accepted colors: blue, cyan, green, yellow, red, orange, magenta, purple, fuchsia, rose, sky, mint, lemon, sand, cocoa, white, black
Simply select your subtitle file.
Yes. Have a look at our Subtitle Tool & Converter.
To export a PDF, select pdf as output format.
You can use otranscribe.com to generate your markers from any audio or video file.
To export the markers go to "Download Transcript as" and download your script as "oTranscribe format (.otr)".
Ambient's NanoLockit is a great way to log takes on set. The log files (.markers) can be converted to any other format using this marker converter.
Learn more about the NanoLockit on ambient.de/collections/nanolockit
You can export comments from Dropbox Replay in JSON format to convert them with our tool.
Our free marker tool offers a huge amount of features to convert and modify files. However, there are some limitations on the free tier that require a PRO subscription to unlock.
Explore Pro Features| Feature | Free | Pro |
|---|---|---|
| Conversion limit | Fair Use | No limit |
| Entries per file | up to 1200 | No limit |
| Premium formats | ✕ | ✓ |
| File encryption | ✕ | ✓ |
We have a light version of our Marker Converter available as an offline app for macOS and iOS. It is aimed at users on air-gapped systems and enterprise customers.
The supported formats and features in the standalone app are outlined in the app description. Not all features from the online app are available in the offline app.
سواء كنت مطورًا أو ترغب فقط في أتمتة المزيد من العمليات باستخدام أدوات مثل Zapier أو Make، يمكنك بسهولة دمج هذه الأداة في مهام سير العمل الخاصة بك باستخدام واجهة برمجة التطبيقات الخاصة بنا. تعرَّف على المزيد حول دمج واجهة برمجة تطبيقات REST في وثائق واجهة برمجة التطبيقات الخاصة بنا.
وثائق واجهة برمجة التطبيقات